

Tags and roles are how Human Intelligence controls data access. Tags label the sensitivity of your data, and roles determine which people can see which tags.Documentation Index
Fetch the complete documentation index at: https://docs.humanintelligence.com/llms.txt
Use this file to discover all available pages before exploring further.
How it works
Data access in Human Intelligence follows a simple chain:Tags label data
Every metric and dimension can carry one or more tags that describe its sensitivity — things like “compensation” or “PII.”
Roles group tags
A role is a bundle of tags. For example, an “HR Leadership” role might include the compensation, demographics, and performance tags.
Users get roles
Each person in your organization is assigned one or more roles, usually based on their job function or team.
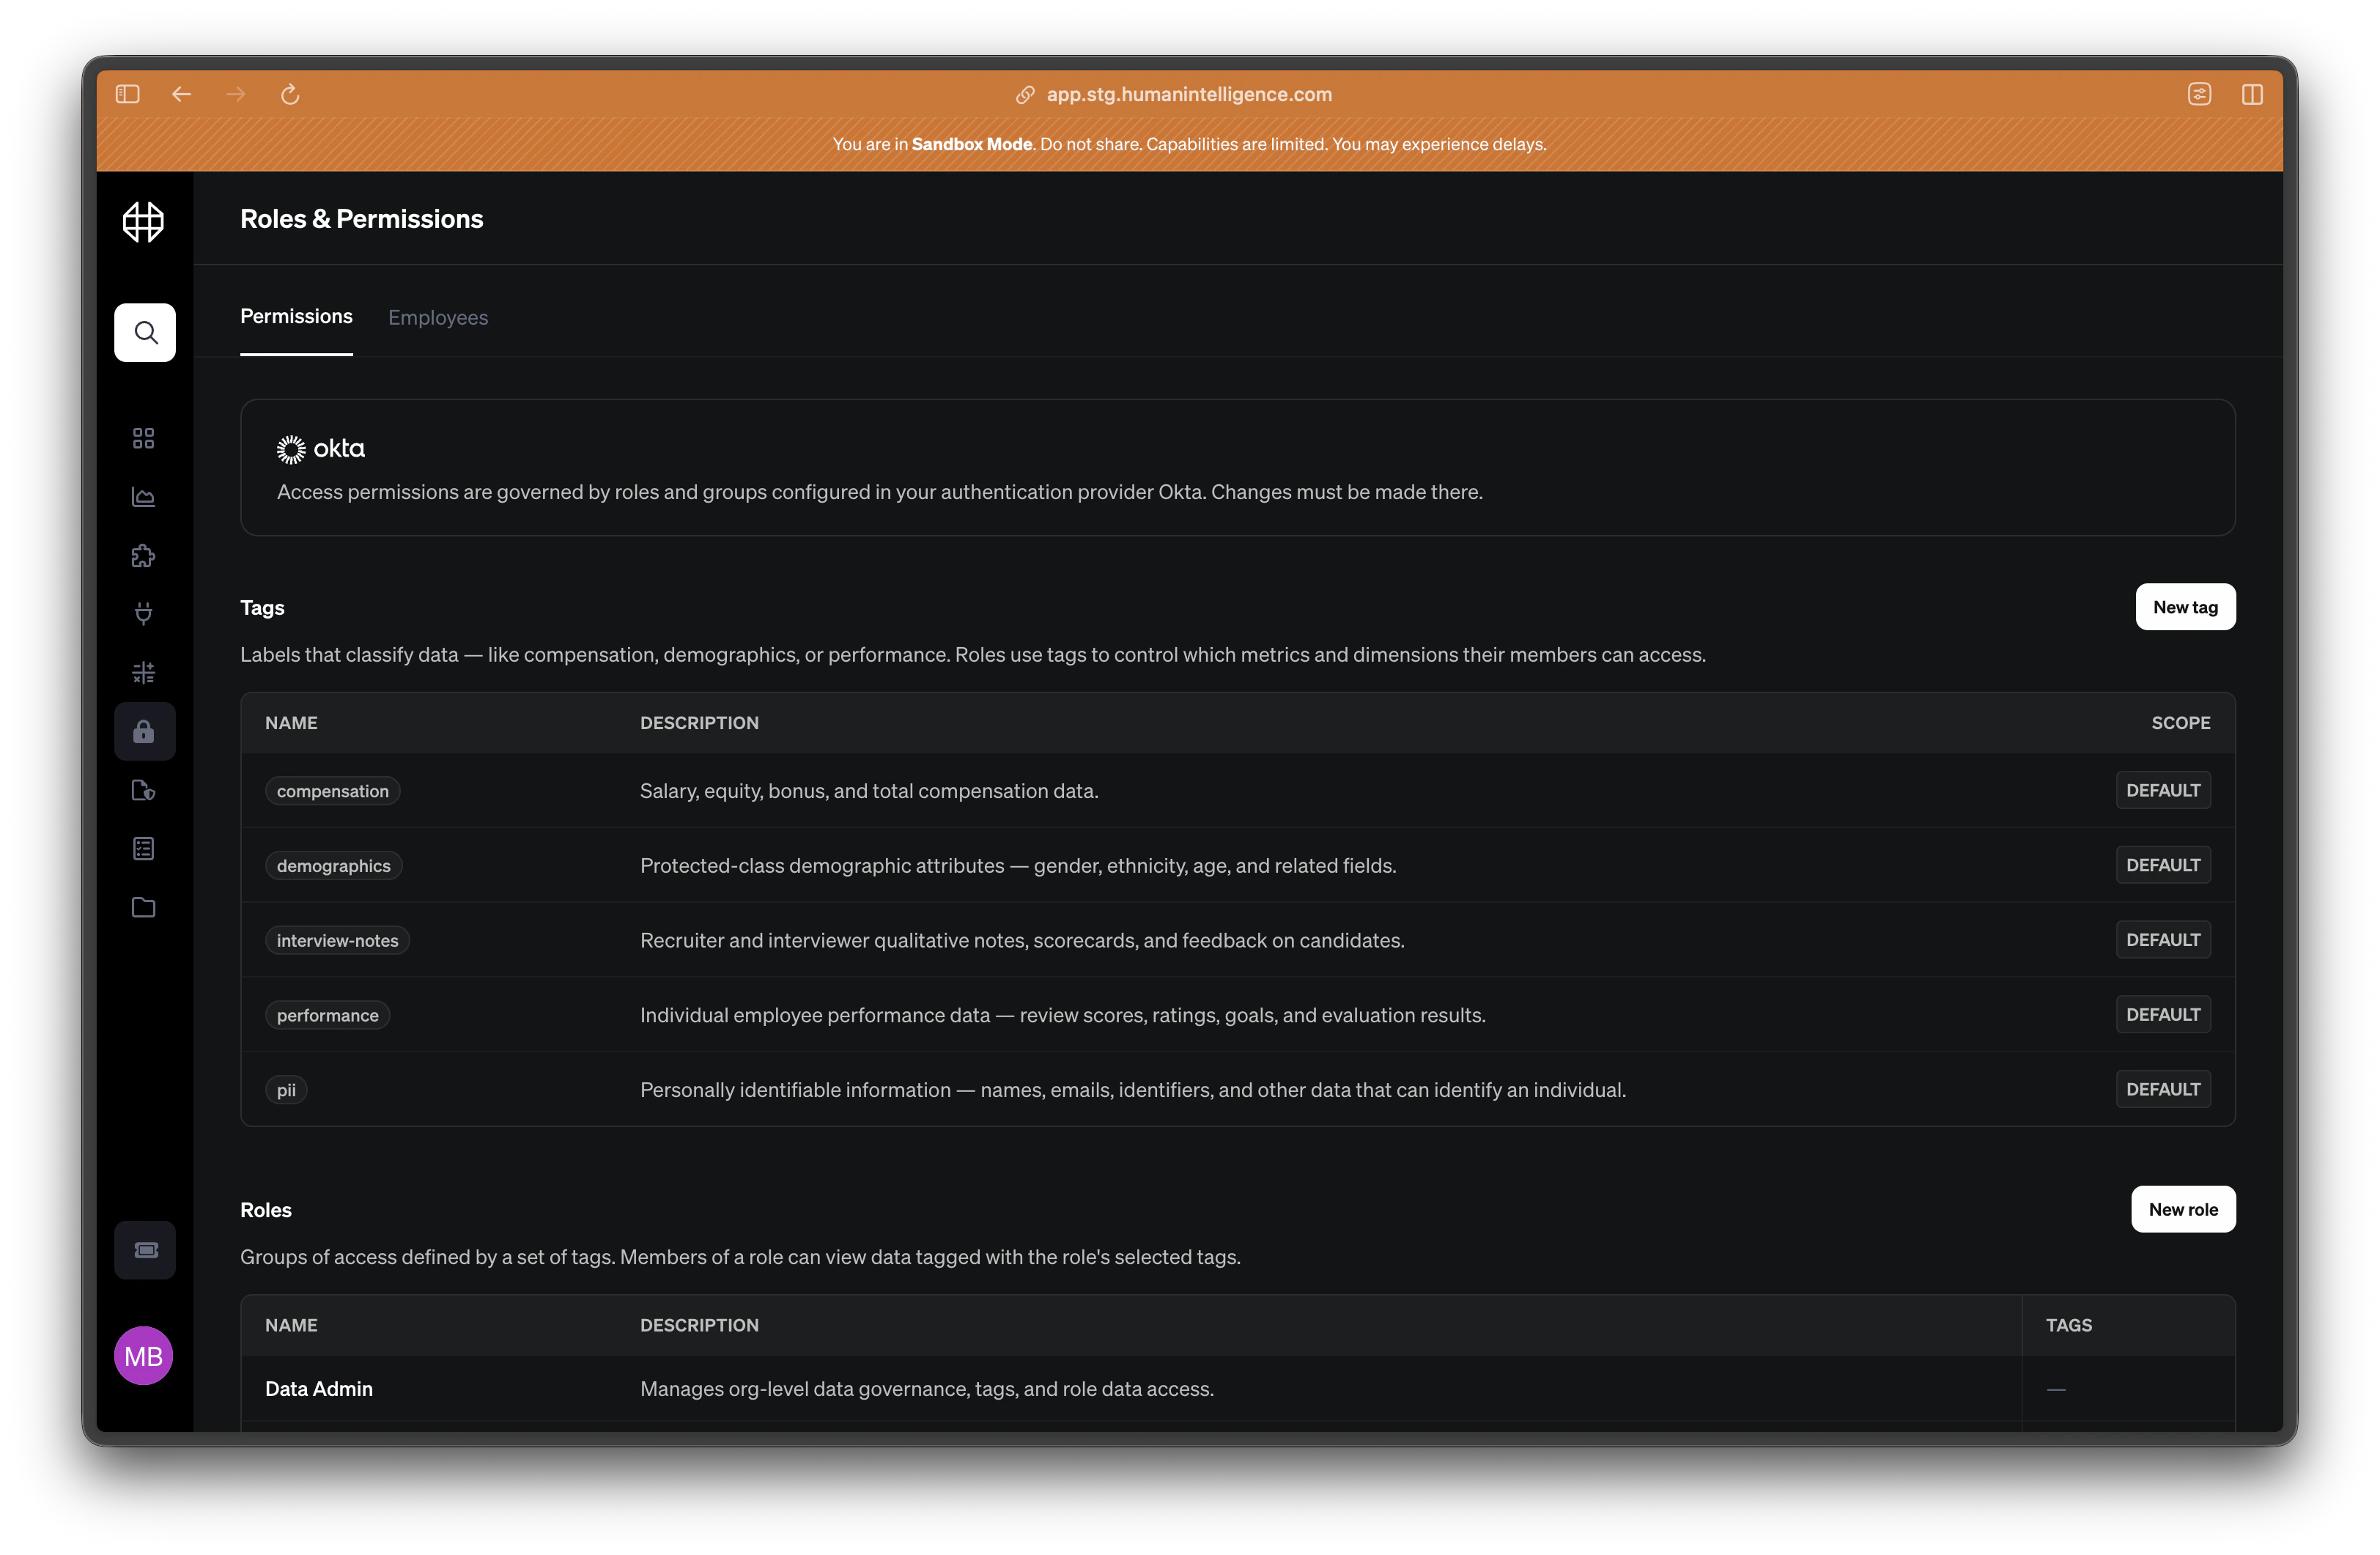
Tags
A tag is a plain-language label that describes what kind of data something contains. Human Intelligence comes with a set of default tags. Your admin can also create custom tags to fit your organization’s needs.| Tag | What it covers |
|---|---|
compensation | Salary, bonus, equity, and pay-related dimensions |
demographics | Age, gender, ethnicity, and other demographic attributes |
interview-notes | Interviewer feedback, scorecards, and hiring panel notes |
performance | Review scores, ratings, and manager assessments |
pii | Personally identifiable information like SSN, address, or date of birth |
Roles
A role is a named group of tag-based permissions. Instead of managing access for each person one by one, you create roles that map to the tags your teams need. For example:- Recruiting Ops — has access to
interview-notesanddemographics. - HR Leadership — has access to
compensation,performance, anddemographics. - People Analytics — has access to all tags.
Creating a tag and assigning it
Open the Permissions page
Go to Settings > Permissions. You’ll see the Tags table at the top with all current tags listed.
Create a new tag
Click Add Tag. Give it a short, descriptive name (like “executive-only” or “recruiting”) and add a plain-English description so your team understands what it covers.
Assign the tag to a metric or dimension
Navigate to the metric or dimension you want to protect. Open its detail panel and look for the Tags section. Select the tag you just created and save.